GA4の設定を簡潔に記す。既にUA(旧アナリティクス)を使用していることを前提とします。
*設定に当たってはGTM (グーグル タグマネージャー) を使います。
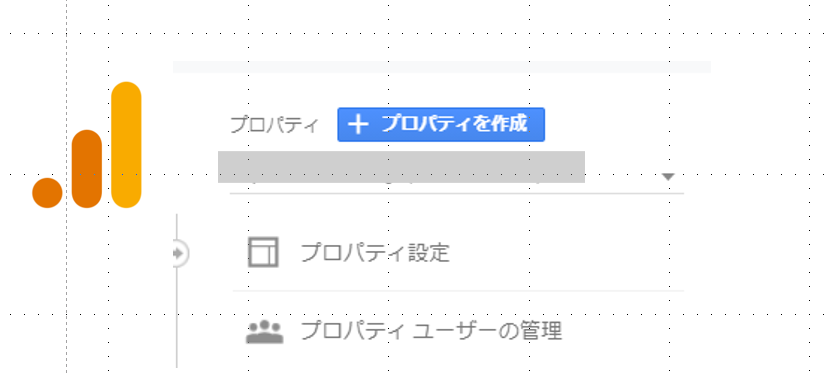
1)アナリティクス管理画面。プロパティを作成 をクリック
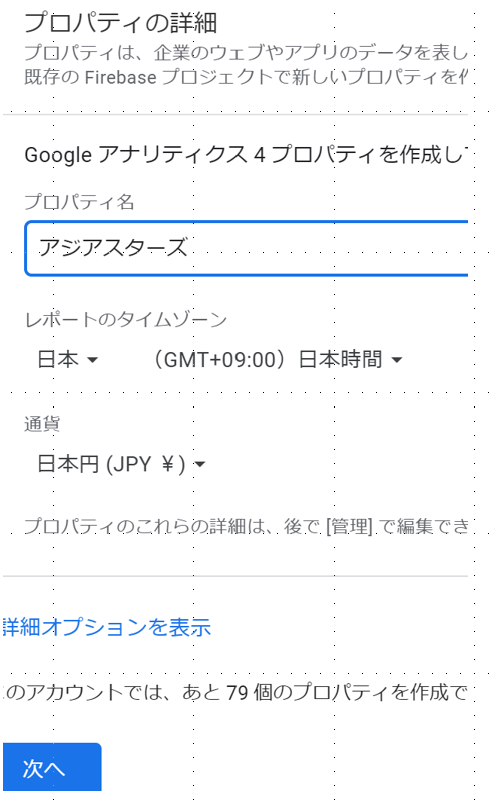
2)プロパティー名入力。タイムゾーン等設定後「次へ」
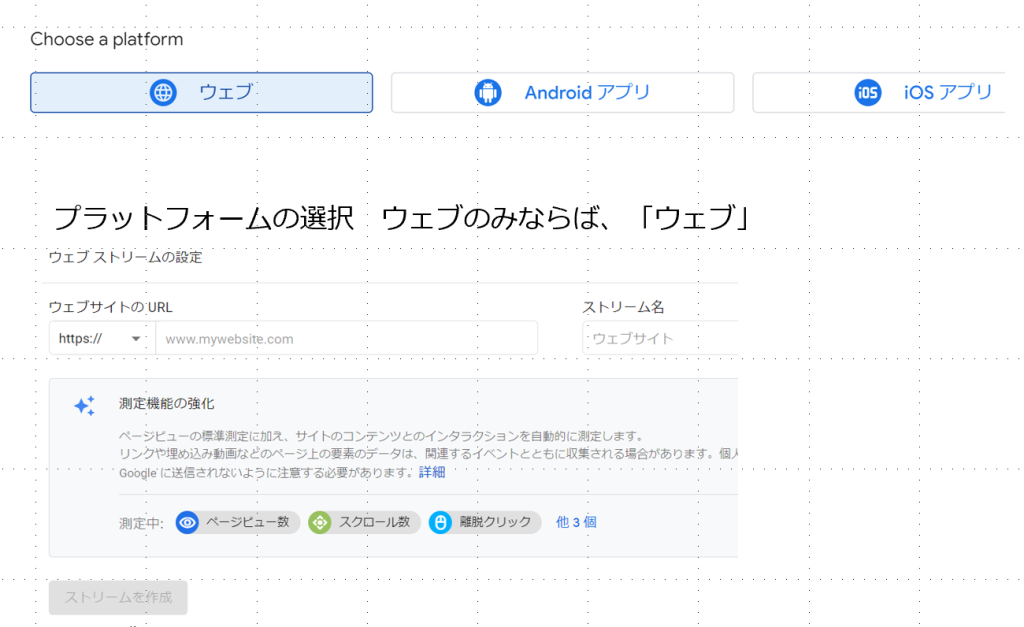
3)ウェブサイトのURLとストリーム名を入力
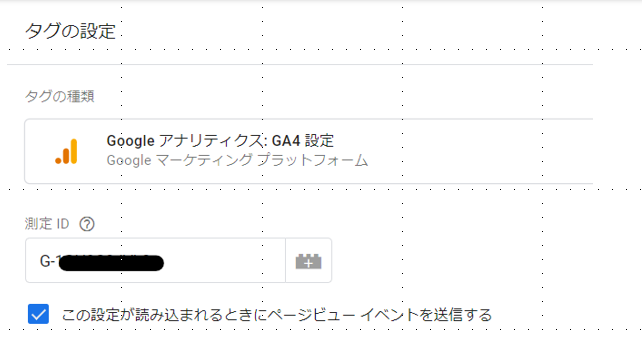
4)測定ID G-****の箇所をコピーしておく。

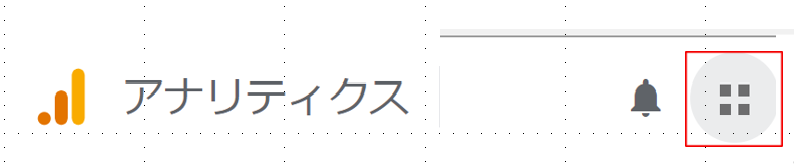
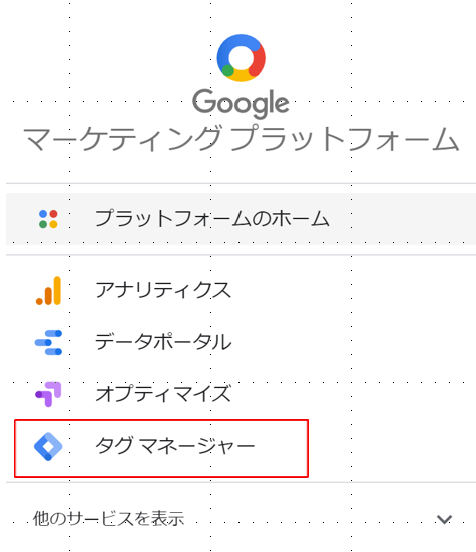
5)アナリティクスを開き、右上の四角が4つ並んだアイコンをクリック「タグマネージャー」をクリック。
*既にGTM を使用している場合はタグの貼り付けまでの説明は無視してください。
*アナリティクスのタグを使用している場合は、アナリティクスタグからGTMタグへのタグの変更が必要です。変更に際しては慎重に行ってください。
GTM上でUAの設定を合わせて行えない場合は、アナリティクスタグに追記する形でGTMタグを設定しても良いでしょう。詳細はアナリティクスに詳しい方にお尋ねください。
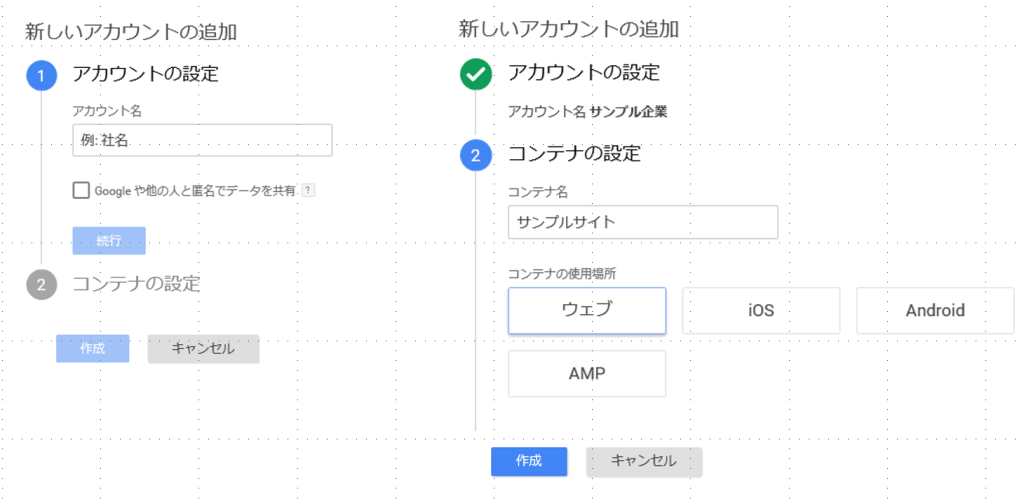
6) GTM(タグマネージャー)が表示されたら、「アカウントの作成」をクリック。

7)アカウント、コンテナ名を入力し「ウェブ」選択。作成をクリック。
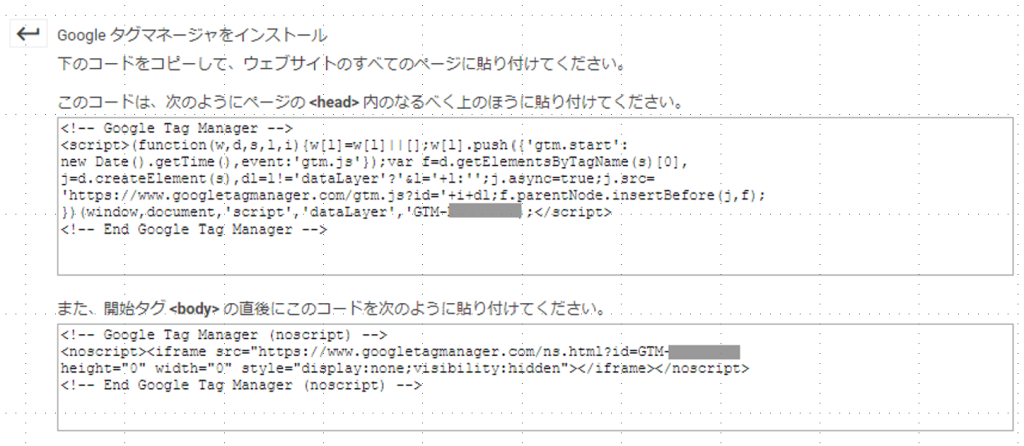
8)GTMのタグ設定。設置には2つのタグが必要。 サイト内の全てのページにて1つ目(上部)は<head>~</head>の間、もう1つ(下部)は <body> の直後に設置。 2つのタグをそれぞれコピーしてペーストする。
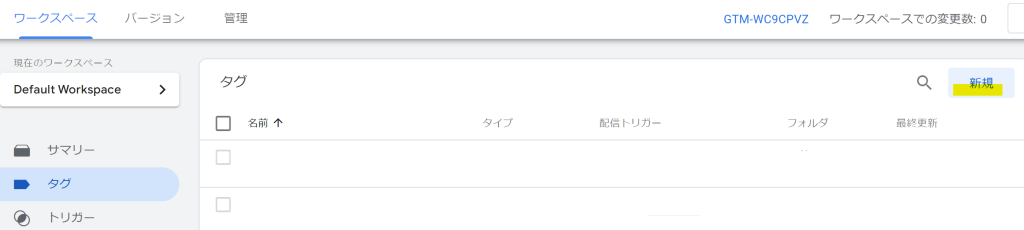
9)GTMのタグメニューから「作成」ボタンクリック
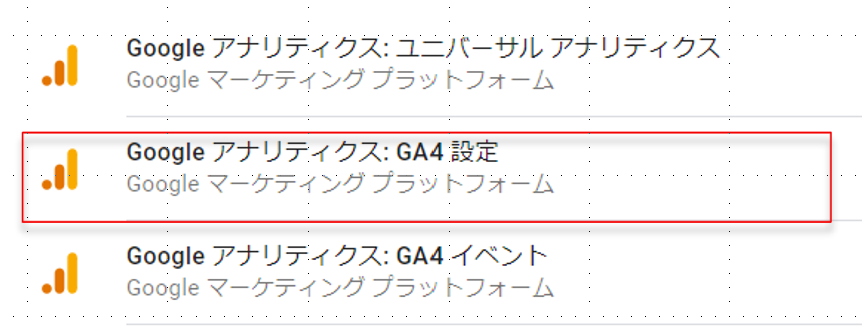
10)Google アナリティクス GA4設定をクリック
11) 4)でコピーしておいたアナリティクス「G-****」を測定IDに張り付ける。
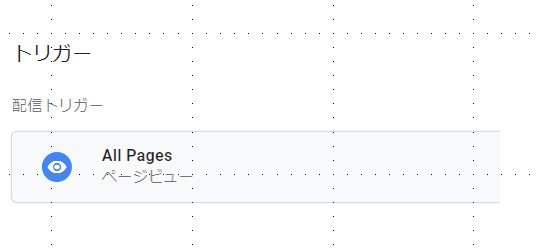
12)トリガーは「AllPages」
これでGA4の設定は終了です。