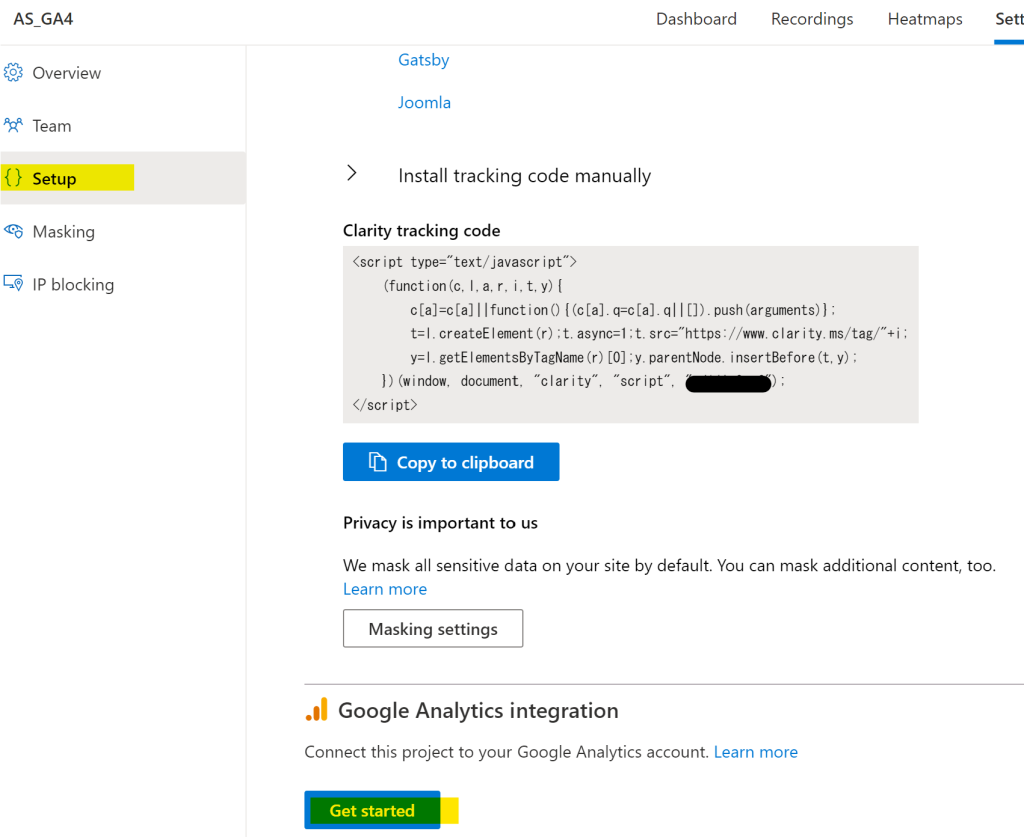
クラリティー(Clarity )の設定、セットアップよりGoogle Analytics Integration のGet Started をクリック。
*前提としてクラリティーのタグはGTMで設定済みとします。
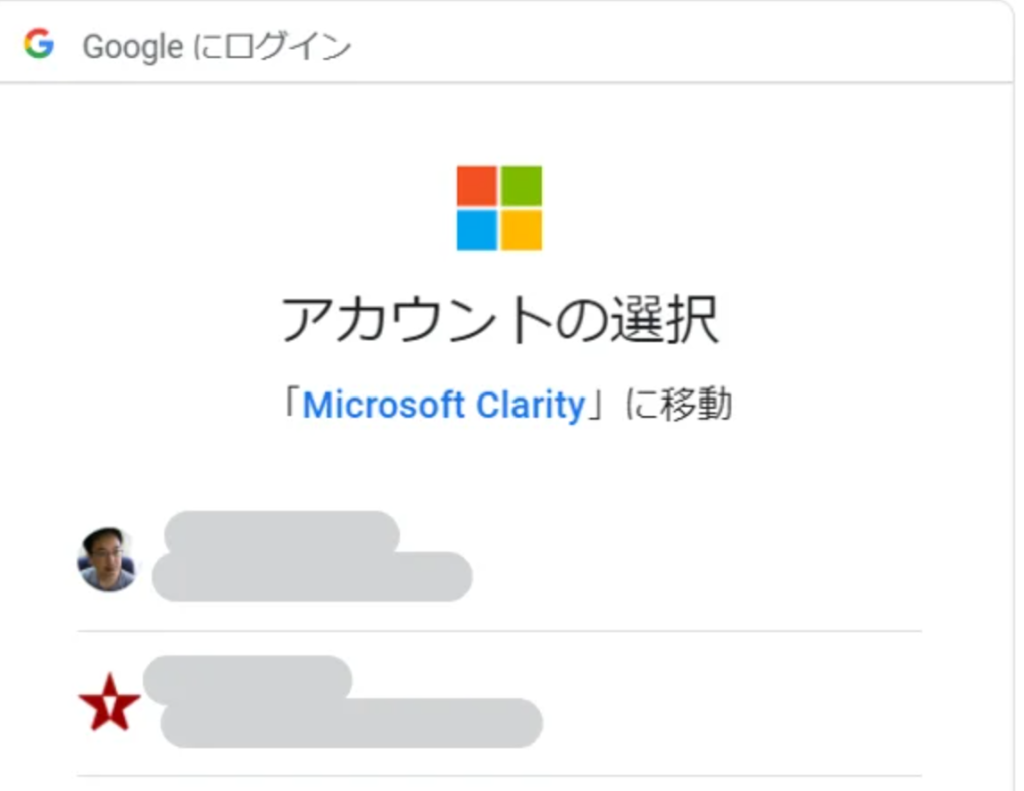
Googleアカウント選択
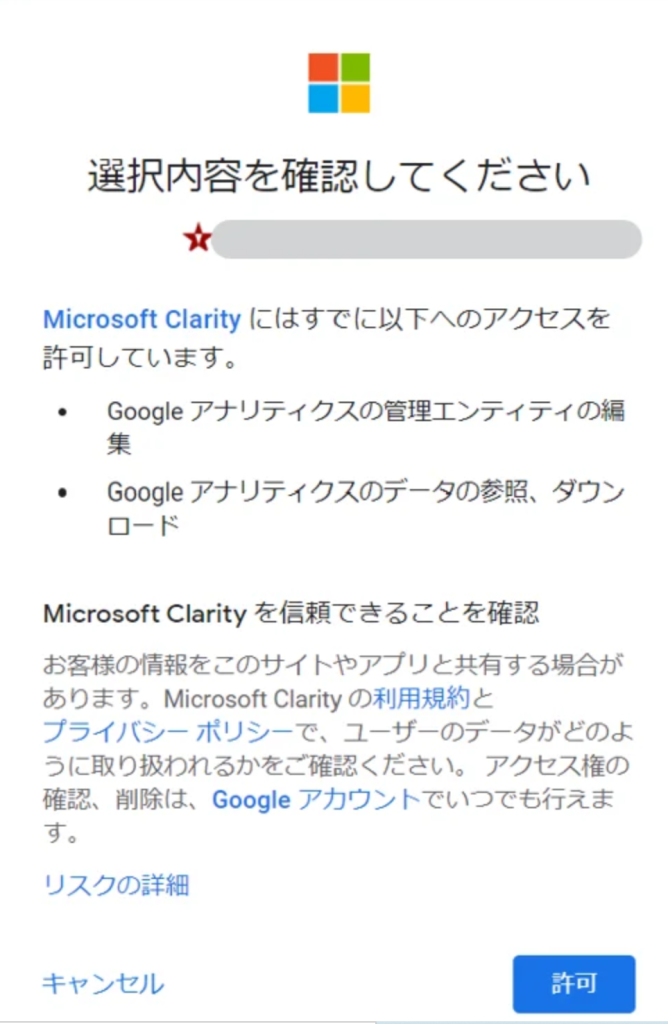
チェックボックスにチェック(Googleアナリティクスの管理エンティティと Googleアナリティクスの データ参照、ダウンロード) 許可クリック
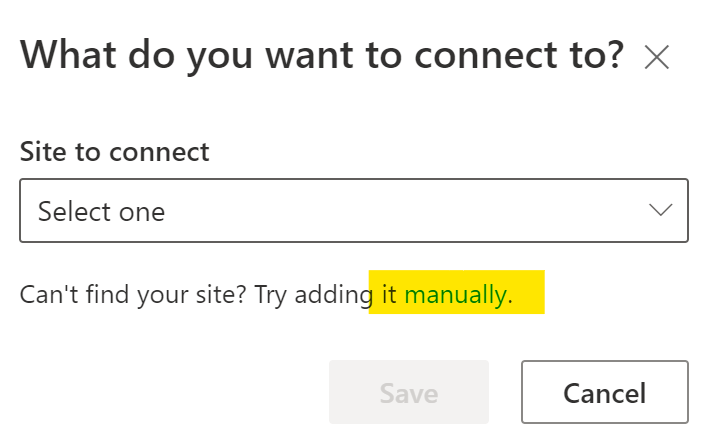
いったん戻って「Finish Setup」クリック

ダイアログボックス表示で、manually をクリック
別のダイアログボックスが表示で、必要項目入力
*下記イメージはダミー文字( 但しClarity_Playback_URL は同じもの入力)。各入力ID説明は後述
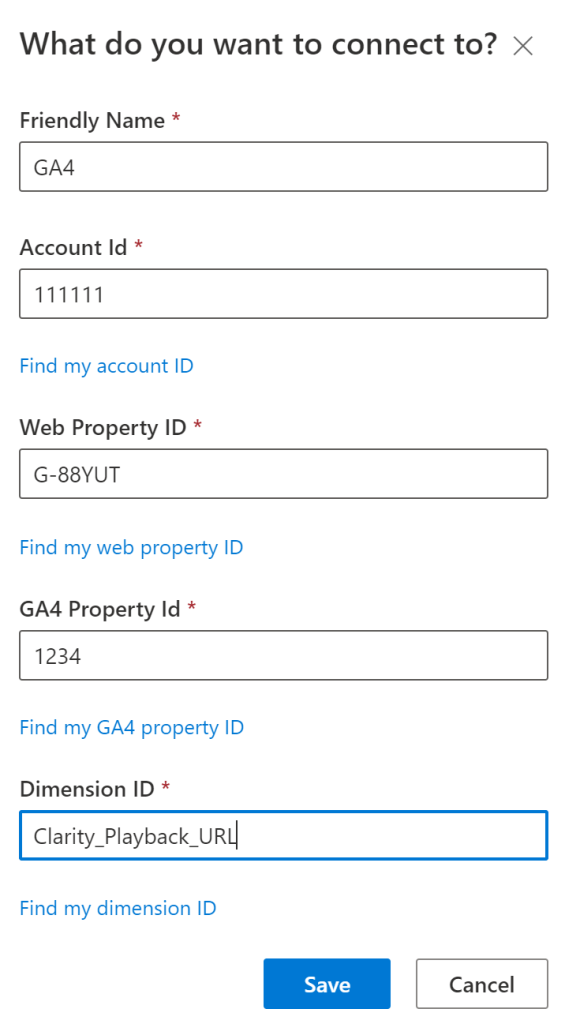
friendly name :GA4で設定した名前をそのまま入力。アナリティクスの設定画面。プロパティー設定クリックしてプロパティー名をコピペしても良い。

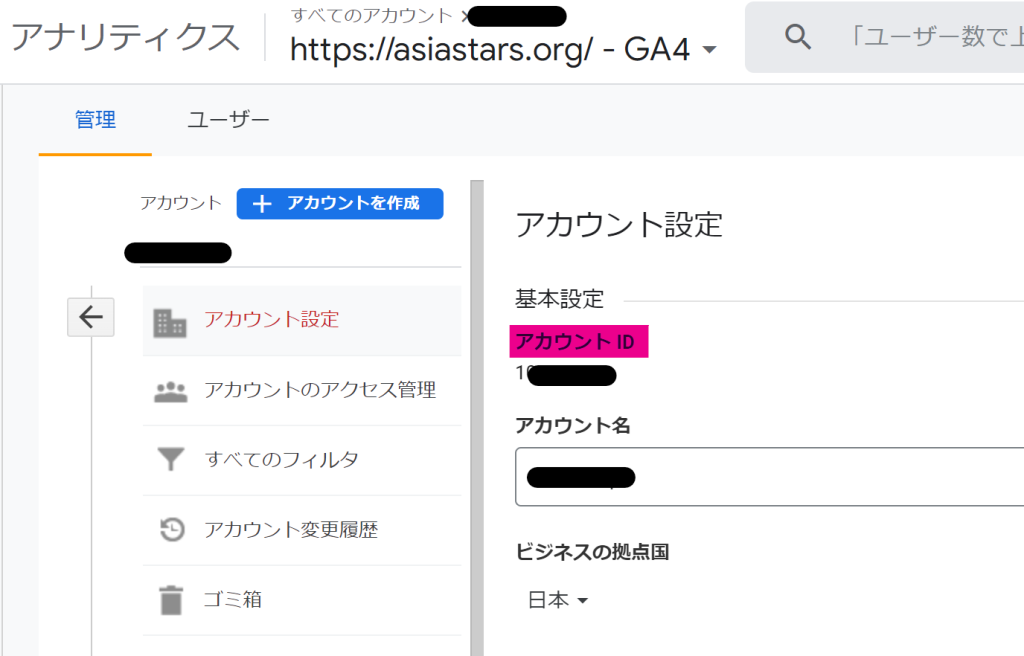
Account ID:GA4のアカウント設定からアカウントID下にある番号
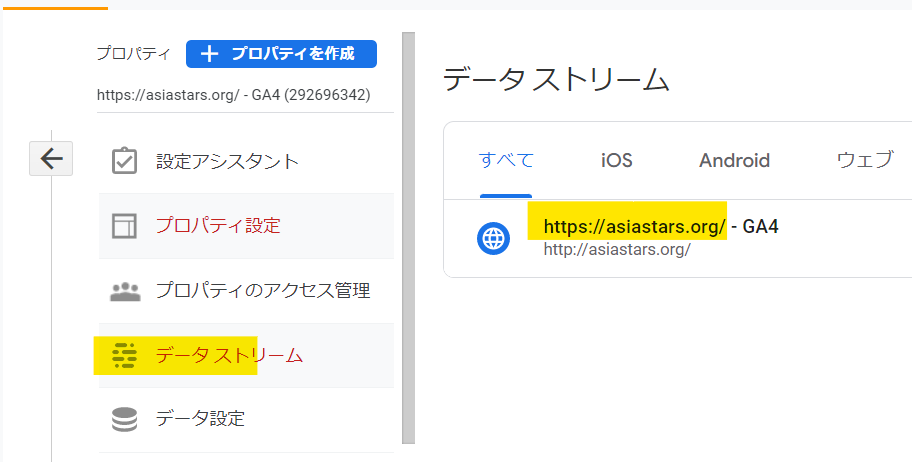
Web Property ID:GA4プロパティー、データストリームから当該データストリーム(例:https://asiastars.org)クリック。測定ID下のあるID (G-*****:)

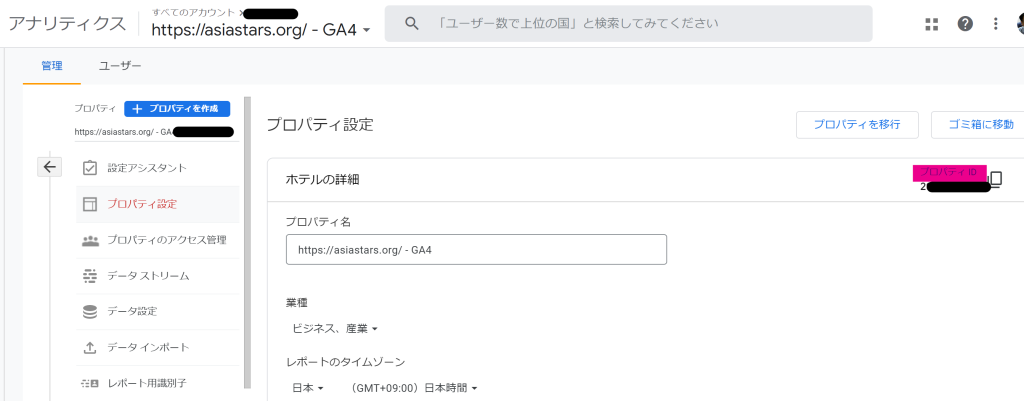
GA4 Property ID:GA4プロパティー、プロパティー設定からプロパティーID下にある番号
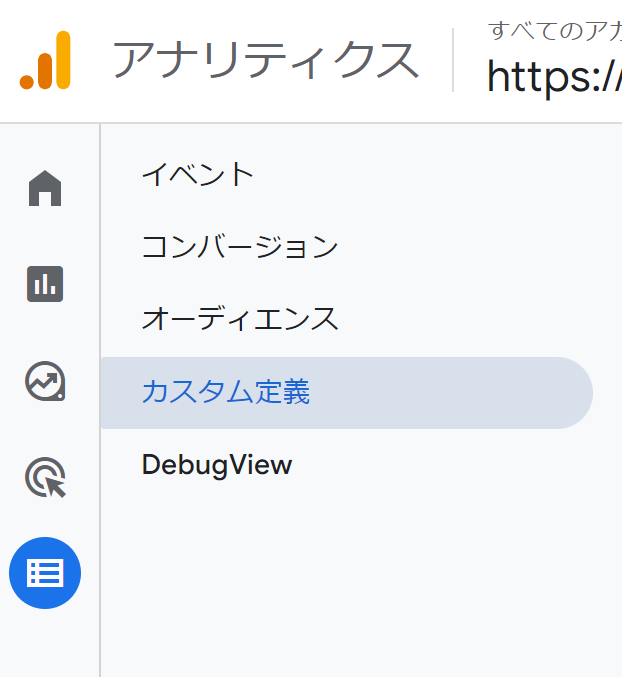
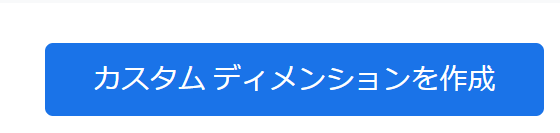
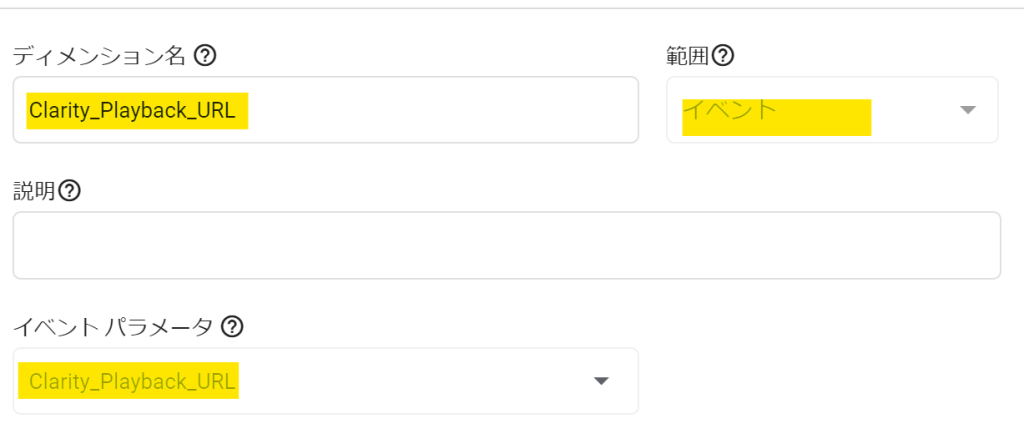
Demention ID:GA4設定、カスタム定義、カスタムディメンション作成、ダイアログボックス「 Clarity_Playback_URL 」入力。範囲はイベント。イベントパラメーターも 「 Clarity_Playback_URL 」入力。(パラメーターの項目は選択するイメージだが入力もできる)保存。
全て入力したら「Save」
以上で終了です。
参考URL:https://docs.microsoft.com/en-us/clarity/ga-integration